Showing posts with label Onion. Show all posts

Monday, 25 November 2013

Spiced Apple Chutney

I think perhaps I forgot I had a blog, or at least I haven’t really had time to have one recently. I've been cooking easy 'go to' recipes like kedgeree or meatballs or things on toast, that I have told you about before. New things I have cooked have either been bad; apple, pancetta and sage risotto, don't go there... Or delicious, but I didn’t take any photos; celeriac and truffle dauphinoise and braised venison in red wine with orange and juniper, my god that was good. I also suffer at this time of year with the dark evenings; I just have a little automatic camera which has seen me very well for the past few years taking some beautiful pictures, but at this time of year in the low light everything just looks blurred and orange. I might just take the plunge and get the fancy pants camera I've had book marked for the past 6 months, or perhaps I should buy some Christmas presents...


I always make some Christmas presents, a few years ago I went to extreme lengths with potted duck, white chocolate and cranberry biscuits, chocolate truffles, chutneys, pickled grapes, florentines, the whole lot... I think a few jars of chutney and some chocolates might be my limit this Christmas, it's been a busy year! This Spiced Apple Chutney, which I have made a few times before, is perfect if you're thinking of making foodie presents for Christmas this year this is a winner. I've made it before in little jars with tiny parcel tags and it went down pretty well I think. Delicious with cheese, or lush Christmas ham with that sugary mustard crust, in sandwiches, with cold meats or potted game, any excuse really...


This isn't a recipe that has to be followed exactly to the letter, how sweet it is will depend on your apples, some recipes add cinnamon or nutmeg too, paprika, allspice or malt vinegar, you can play around with it, the following recipe is what I've settled on as one of my favourites...


Peel and dice 900g of cooking apples, I've used a mix of cooking and eating before too. Then combine 550g of caster sugar, 200g of brown sugar and 900ml of cider vinegar. Heat the mixture through to dissolve the sugar and add a tablespoon of ground ginger, 2 tablespoons of mustard seeds, a large pinch of salt followed by two large diced onions, 2 cloves of garlic crushed and chopped and 250g of raisins. Finally add all of the diced apples and stir it well. Then simmer for about an hour, it is difficult to say exactly as it depends on the amount of water in your apples. I have cooked it for 45 minutes before, and also 2 hours... You want it to turn quite dark and to begin to take on the consistency of warm thick jam. Then pot into warm sterile jars.


Finally leave it to sit, for it to do its stuff. Be patient, I'd say 3 weeks minimum, in a cool dark place, some people say 6 weeks. I've never managed to wait that long but it's perfect timing for Christmas presents... It is my favourite chutney I think, sweet, thick tangy and spiced, SO good with some ham, bread and butter or a piece of cheese. I was so disappointed when my last batch ran out, I'm hoping the next one will be just as good!! It keeps for ages, recipes say to eat chutneys within a month, but generally they last a lot longer, if you can manage to not eat them for some odd reason...


Wednesday, 5 September 2012

Rollmop Herring

Herring have a long historical connection with the North East of England. Originally the small scale exploitation of an abundant local resource, fishing grew to become a thriving industry all down the east coast during the last century, with whole families in the coastal community relying on Herring for their livelihood. Too much of a good thing eventually saw the fish run out and the industry decline but these versatile, if unfashionable, fish are still caught in the North Sea today.

The herring are in season over the summer in the North East and cost next to nothing. These little fellas were 50p each from the Grainger Market. I bought them to go into Mr. Smokerson, home smoked herring sounded delicious, even though the guys at Craster are pretty good at it I fancied a go. That was until I found out it took 5 days... And even by my standards taking 5 days off work to sit and smoke some fish seemed a bit excessive.


The herring season begins in June in Scotland and works its way down the North East coast over the summer months towards Lowestoft, coming to an end in November. Amble, Cullercoats and North Shields were our main local fishing harbours for herring back in the day. Amble harbour was built in 1830 and was famous for its fishing cobels, which were out in force to catch the 'silver darlings' as the herring became known.

My great grandfather used to have two cobels in Amble harbour; they were beautiful boats, each being built specifically for its user. Boats fished with seven or eight lines, about 200 metres long, with 500 to 1,000 hooks on each, baited with mussels. Baiting the lines was a very timely task usually left to the women, old men and children at home; with children often being absent from school during the herring season. A harbour in Lowestoft once recorded a catch of 60 million herring in one day, so you can see why they were an important visitor...


The rollmop, essentially a pickled herring, has been a staple in Northern Europe since Medieval times, probably being more popular in the Baltic areas of Northern Europe than over here. I have always enjoyed them so decided to give them a go. I went with a Hugh Fearnley-Whittingstall recipe for my first attempt, a cider vinegar and orange pickle. The flavour is really deep and rich compared to other roll mop I have had, spiced and orangey, but fresh and sharp with sweet soft fish.

To start you need to take the fillets off each of the fish as carefully as you can, I'm not the neatest at this yet but am getting better... Then remove any bones left in the fillets, running your fingers along them to feel where they are and pulling them out with some little pliers or tweezers. Dry each of the fillets with kitchen roll and then place them into a plastic Tupperware type container. Dissolve 60g of salt into 500ml of cold water and pour this brine over the herring fillets, then leave for 2 to 3 hours.


To make the pickling mixture add 500ml of cider vinegar, 250ml of cider, 12 allspice berries, 12 black peppercorns, 6 bay leaves, 1 tablespoon of brown sugar, 1 teaspoon of mustard seeds, the zest of an orange peeled in wide strips and a thinly sliced small onion. I also added a pinch of general pickling spices. Bring this all to the boil and simmer for a few minutes, then leave to cool.


When the fillets are ready to come out of the brine dry them carefully with kitchen roll. You will need a large kilner jar or something similar that seals tightly. Roll up each of the fillets, skin side out, from tail to head; and pack them into your container tightly so they stay rolled. Then pour over the pickling marinade, make sure you have orange and spices in the jar with the fish and liquid, then seal the jar. Store them in the fridge for at least 3 days before eating, they will keep for about a month, and are best between 5 and 10 days. The longer you leave them the softer the fish becomes and the more pickled they will taste.


Pickled fish doesn’t immediately set everyone's taste buds tingling, but these are really fresh and delicious, sharp vinegar with rich orange and spices and the fish tastes fresh, soft and delicious. Hugh recommends serving with some brown bread and sour cream; they have been a treat to have in the fridge over the past few weeks. I will definitely be making more, trying different pickling combinations as I go. I have come across recipes using mace, white wine vinegar, dill, cloves, fennel... I had best get back to the Grainger Market before the season ends...


Sunday, 15 April 2012

Roast Pork Belly and Fennel Seeds served with Poor Man’s Potatoes

The allotment looks somewhere near normal, well the most normal it has looked since I got it two years ago, by normal I mean tidy, a bit tidy, in parts... because that's what everyone else's looks like, tidy, weed free, organised. Apart from the odd one, which I look at in delight when they are worse than mine.

In the past few weeks I have been making a real effort though, this is the year that I am going to get on top of it, be organised and grow loads, that's what I'm telling myself anyway. I have surfaces covered in seed trays around the house, the peas have popped up along with the broad beans, and still to emerge are sweetcorn, sweetpeas, turks turbans, green courgettes and yellow courgettes. I've planted beetroot, parsnips and poppies at the allotment and have two types of potatoes chitting on the window cill. Chitting is a technical term for sprouting shoots... I now speak horticulture... The seed potatoes came from the garden centre in Gosforth Park, Pink Fir Apples, which are delicious apparently and Duke of York’s. All this makes me sound very organised, but if you could see the thousands of weeds and huge grass chunkers taking over my plot you really wouldn’t think it...


After two hours of hard work gardening this left over roast pork belly was totally delicious, even more delicious than last night perhaps. It is a Moro recipe, Cerdo al Horno, and is the best pork I've turned out so far I think, my previous method with herbs wine and water seems a poor comparison all of a sudden. This one is roasted without any liquid for three hours with fennel seeds, garlic and lots of salt; crispy, soft, salty and delicious... Served with Poor Man’s Potatoes, Patatas a lo Pobre, slow cooked potatoes in olive oil with sweet onions, garlic and green peppers. I didn’t want it to end...


Start by bashing 1 tablespoon of fennel seeds in a pestle and mortar together with 2 cloves of garlic and a pinch of salt. Rub this all over the flesh side of your piece of pork belly, not the skin, the other side. I used a piece of pork belly from the Grainger Market that weighed about 1kg and would feed four. Turn the meat over and sprinkle the skin side with salt, lots of it. Ask the butcher to score the skin for you and rub the salt into all the slashes. Leave it to sit for half an hour and pre heat the oven to 230°C.

After half an hour brush the excess salt off and dry off any water that has come to the surface, put the pork into a roasting tin greased with olive oil and put it in the oven on a high shelf for half an hour. Make sure the oven is really hot, as this will form the hard, crispy crackling. Then turn the oven down to 180°C and cook for another 2 ½ hours. When it is done remove from the oven, transfer it to a chopping board, cover with foil and leave it to rest for 15 minutes.


I tried to make a gravy with the pan juices, Moro say to put the roasting tin on the hob, deglaze with 150ml of white wine and scrape up any sticky bits into the sauce, it looked like real gravy, it tasted of burnt bits and aluminium, you may have better luck than me...

While the pork is cooking you can make the Poor Man's Potatoes, heat 5 tablespoons of olive oil in a large pan, then slowly cook 3 large thinly sliced onions with a pinch of salt until golden and sweet, about 30 minutes. Stir them now and again so they don't catch on the bottom of the pan. After 30 minutes add 5 cloves of garlic sliced thickly, 3 green peppers roughly chopped and 4 fresh bay leaves, continue to cook for another 15 minutes. Then cut about 750g of new potatoes into wedges, salt lightly and leave for 5 minutes.


When the pepper is softened add another 10 tablespoons of olive oil, wait for it to heat up and add the potatoes and let everything simmer in the oil until the potatoes are cooked. Moro said about 20 minutes, I found it to be more like 45 minutes... Stir now and again to stop it sticking and turn it up a bit towards the end if it needs to be a bit browner and stickier... Finally drain through a sieve or colander before serving to remove the olive oil, keep the oil though as it tastes delicious for bread dipping or making crispy onions...

Serve a slice of the crackly crispy pork, which is meltingly soft in the middle and crispy, salty and crunchy on the outside with a big pile of slow cooked potatoes, peppers and garlic. They go so well together and taste even better the next day, I'm pretty glad I made far too much...


Saturday, 14 January 2012

Pot Roast Brisket

So I'm sat in my house wearing five layers, I also have gloves on, and a scarf, I would put a hat on but people can see me from the street and I think I look odd enough. My boiler isn't working, just in time for the first frosts we've had all winter. I have a coffee and a relatively ineffective gas fire to huddle by. I also have some ox tail in the fridge which we are going to stew for supper with wild mushrooms, and perhaps we'll open a nice bottle of red and it won't seem quite so cold... A man called Ted is coming to fix it after the weekend, well at least I hope he's going to fix it or it's going to be a pretty cold winter here is my little leaky house...


I bought the ox tail and this piece of brisket from a new butchers in Jesmond called The Meat Merchant. I was impressed, they have a wide range of meat, it wasn't expensive, and they have everything from rabbit, to proper pancetta and metre long sirloin steaks if that's what you are after?

This isn't a very complicated recipe, just some chopped vegetables and herbs, red wine and three hours in the oven. The brisket is a cut from the front of the cow, just above their front legs, it takes all the weight of the animal most of the time, so is pretty fibrous and strong... and as a result it needs some long slow cooking to loosen it up, for those fibres to begin to fall apart and become all soft and tasty... It is also brilliant for leftovers, we had warmed through soft slices on chunky hunks of bread with loads of horseradish and watercress, and then had the leftover juices and vegetables as a stew slash soup with a bit of crusty bread.


Chop 2 leeks, 2 carrots and 2 onions and put them in the bottom of a big casserole dish, one that is about the same size as your piece of meat. These amounts would have fed four people easily. Add 2 whole heads of garlic, ten peppercorns and a bundle of herbs tied up, parsley, thyme, bay... Lay the piece of brisket over everything and pour over 1 litre of chicken stock and 2 glasses of red wine. You want the brisket to be still poking out of the top, not submerged entirely. Cover with tinfoil and put it in the oven for 3 hours on a medium heat. You want it to be soft and delicious, not falling apart totally, it still needs to be sliced, but only gently.


I served it with a little scoop of mash, lots of horseradish, some of the juices and vegetables spooned over the top, a pile of buttery cabbage, a glass of red wine and the heating on full... those were the days...


Sunday, 6 November 2011

Cassoulet

This is the first cassoulet I have ever made, and apart from the fact that it was totally delicious, it also produced meals for about three days. I love a few left overs for lunch the next day, or a meal that turns into something else, or gives you stock or fat to flavour your next meal, it feels good to reuse everything... It saves money, reduces waste and I like the idea of using every scrap possible of a duck or a piece of meat, to really put the little fellas to good purpose...

A cassoulet is a stew of sorts, a rich slow cooked French casserole, with roast or confit duck, sausages, bacon, lovely stock full of herbs and tomatoes and lots of white beans, all topped with crispy, golden baked breadcrumbs. So there was the first cassoulet evening, in all it's splendour, with rich duck and crispy breadcrumbs and a bottle of young French red wine. Then the remains travelled all the way to the Lake District to be heated through with new sausages, fresh bread for dipping and crispy green salad. Finally some came home with us again and made a lovely beany soupy lunch. A well travelled cassoulet indeed...

In the French peasant origins of the dish they used to deglaze the pot from the previous cassoulet as a base for the next one, and so on and so on, which led to stories of one original cassoulet being extended for years and years, mine just lasted a weekend... It is a dish to be made in quantity really, this will feed four or more people, just add more duck if you have more people...


I started with a pot of duck stock made from the bones of the Roast Duck with Chestnut, Chorizo and Cabbage... and with Elizabeth David... I've been carrying her book around with me lately. Sometimes to work so I can look up recipes at lunchtime, over to the Lakes to read in depth the bits I haven’t gone through before, looking for new and interesting methods and recipes. I am aware that this is not normal behaviour, constantly travelling around with recipe books... and I have had a few funny looks as people get into my car to find little book collections in the foot-well, but hey...

Start with a pan for the stock, you will need a larger pan for the whole cassoulet which will go in the oven, but start with the stock pan on the hob and heat a large splash of olive oil in it. Add two thinly sliced large onions and cook until they are soft, about ten minutes, then add some chopped smoked streaky bacon, about 6 slices cut into smaller pieces, and continue to cook until it is all golden and sticky.
Pour in the stock, I used about 500ml of duck stock, you can use chicken stock, add two tomatoes chopped into pieces, four crushed cloves of garlic, salt and pepper, some sprigs of parsley, thyme and a bay leaf and bring to a slow simmer. Leave it to simmer away for about 20 minutes. I think this is the tastiest stock I have ever made by the way... I kept on having sneaky spoonfuls all the way through...


Most cassoulet's use confit duck legs, but Elizabeth does say that to use fresh duck or goose if confit isn’t an option, which it wasn't, but it will need to be half roasted. So while the stock was simmering I put a whole duck in the oven for 10-15 minutes at 220°C. Then took it out to rest and cool enough to cut up.


You will need a big oven proof type pot for the cassoulet. Rub the inside of it all over with raw garlic to begin with. Then add about 6 good quality raw pork sausages cut in half, I also added about 4 teaspoons of duck fat from a previous roasting... You could substitute with lard or dripping... Then the duck, cut into pieces. My knives are really not very effective so we got as far as cutting it in half, it would be much better into quarters or sixths as it was really pretty difficult to eat a bowl of stew with half a duck sitting in it!

Pour two tins of drained haricot beans over the top of all of the meat and then pour the stock and all its contents over the top of everything. Bring this all to the boil on the hob and then sprinkle a few handfuls of white bread crumbs over the top. I used a stale sour dough wizzed up in the food processor until it was a fine crumb.


Then place the whole cassoulet in a low oven, about 160°C, for an hour. The stock will soak into the meat and the beans and a lovely golden crust will form over the top. Delicious... Just serve it as it is, it doesn’t need any help at all. It is rich and meaty with beautifully flavoured stock and beans, it is one of my favourite things I have cooked, really lovely... I am going to get to grips with some confit soon and make it again with confit duck legs...

I found a little tip in Elizabeth David's soup section that advised heating up the left over beans and stock and pounding them through a sieve, reheating this purée with a little milk and adding pieces of cooked sausage. It is just as good reheated in its stew form with new cooked sausages, or as a simple beans stew with crusty bread. It's just good all round really...


Sunday, 23 October 2011

Roast Pumpkin and Garlic Soup with toasted Pumpkin Seeds and Gruyere

We took a little trip over to the Lake District this weekend to check out its autumn colours. We were greeted by golden beech hedges, rain, mist and cows on the road that refused to move. It was a real stand off, they just stared us out and didn’t move one inch, which ended in us driving into a ditch to get past and very nearly getting stuck. I had visions of having to walk a mile in the rain to the nearest farm to get the car pulled out of a ditch... We made it in the end though and spent a lovely evening by the fire with the wind whistling around us. The next morning was bright and sunny and beautiful. You could hear the stags in the hills roaring at each other, hidden by the golden red bracken. The cows had helpfully moved out of the way for the drive home...


This month I have the privilege of a five page recipe feature in the magazine Living North. They asked me if I would put together a selection of Autumn recipes with hints of Halloween, so if you pick up a copy you can read about Toffee Apple Muffins, Roast Pheasant with Chestnuts and Wild Mushrooms, Dark Chocolate and Chestnut Tart, and this... Roast Pumpkin and Garlic soup with toasted Pumpkin seeds and Gruyère...


Preheat your oven to 220°C and begin by slicing the squash into eight wedges and scooping out the seeds. I find you can get a really good selection of squashes in the shops these days. This recipe works with pumpkins, butternut squash and all types of other squashes, I used an onion squash. The Halloween pumpkins that you find in the shops at this time of year are grown mainly just for carving and are not very full on flavour. The onion squash is a deep rich orange squash that looks a little like an onion... and is best roasted which brings out its earthy, nutty delicious flavours.

Place them all in a baking tray, season with salt and add a generous glug of olive oil, they tend to soak up quite a bit. They need to cook for about 30 minutes, but after 15 minutes throw in 6 cloves of garlic still in their skins and some sprigs of thyme and continue to roast, turning the squash around as you do.


While the squash is cooking dice a stick of celery, a carrot and an onion into small cubes, heat a large splash of olive oil in a heavy pan and add the vegetables. Add a large pinch of salt at this point and cook over a medium heat for about 15 minutes until soft and sticky, you don't want them to brown too much so keep an eye on them.


When they have reached a soft sticky stage add a litre of boiling water, you could also use vegetable stock if you wanted. Leave the stock to simmer until it is time to add the squash. The squash is ready when it is golden brown and soft all the way through, remove it from the oven and allow it to cool a little, make sure you keep the garlic too. When you can handle the squash you need to remove the skin and cut the flesh into large chunks and add them to the stock. Next remove the soft roast garlic from its skins and add these to the stock too. Check for seasoning at this point, you might have to add some more salt.

Allow everything to simmer for another 10 minutes. Finally blend everything to a smooth velvety soup, with either a hand-held blender or a food processor.

To serve top with a scattering of pumpkin seeds, lightly toasted in a dry pan and a grating of Gruyère cheese.

The nutty roasted flavours of the squash and the garlic are delicious with the crunchy seeds and creamy melted cheese. A bit of crusty fresh bread and cold butter makes a delightful autumn lunch...


Thursday, 20 October 2011

Onion and Gruyere Tart

My stall at Autumn Graze was full of tarts... I don't mean my sister and the Blonde... more onion, gruyere, chorizo, spinach, apple and lemon ones... I sold every single slice thankfully and they were pretty delicious, especially the lemon, and the onion and gruyere, oh and the chorizo and red pepper... I even had emails from people saying how much they had loved them, and about them bringing back childhood memories... this is high praise indeed so I thought I would share the recipe...


The savoury ones are all based on an Elizabeth David recipe for Tarte a l'Oignon. It is a pretty simple recipe, delicious with just onion and gruyere, but you can add anything really. Some left over cooked ham went into this one, or try some fried up bacon, wilted buttery spinach, sliced chorizo, chopped herbs or roasted red peppers...

Grease a tart tin and roll out your shortcrust pastry to about a centimetre thick, you can make it yourself or buy it, I bought it this time I admit... But it is pretty easy to make. Then line the tin with the pastry, pressing it into the corners with your knuckles and trimming it to a neat edge around the top, it does shrink a little so leave a slight overhang.


Next thinly slice 4 or 5 onions and melt a tablespoon of butter in a large pan, then add the onions and a pinch of salt. Cook them slowly on a low heat with a lid on for half an hour. Stir them every now and them, they will become very soft and translucent and buttery... and smell amazing... When they are ready stir in 2 beaten eggs, 100g of grated gruyere and a pinch of salt and pepper.

Finally fill your pastry lined tart tin with the onion mixture and bake in the oven at 170°C for half an hour, until it is golden and beautiful! It is delicious hot or cold, better than any quiche type thing I've ever bought in a shop and is pretty simple, especially if you buy the pastry... It is quite simply a treat... A delicious cheesy, buttery onion treat...


Sunday, 7 August 2011

Chicken Tagine with Caramelised Baby Onions and Honey

The Lake District was beautiful and sunny on Friday evening, sitting in the quiet of the valley watching the deer with their new bambi's was a lovely end to the week. It did rain pretty much continuously from then on in, but it was still a lovely weekend. It stopped long enough to light the bbq for supper, but also managed to soak us thoroughly while out for a walk. The mist was rolling down the hills dramatically as we left but even in bad weather it is still such a beautiful and relaxing place.

So it may be August, British Summer Time, in case you had forgotten, but I think this rainy windy day calls for something a little bit warming... I have mentioned Claudia Roden before, her book Arabesque is never far from hand in my kitchen. A taste of Morocco, Turkey and Lebanon, full of spice and flavour. My favourite section is full of Moroccon tagines, spiced with ginger and cinnamon, sweet with honey and perfumed with saffron...


Claudia uses a whole jointed chicken for her version of this tagine, but as I was only cooking for two I used boned chicken thighs. I find chicken thighs much tastier than breast meat, and for longer cooking times like this tagine, thigh meat is much less likely to dry out.

Start with 150g of shallots or baby onions. Pour hot water over them, in a bowl, and leave for five minutes to blanch. This makes removing the skin whilst keeping the onions or shallots whole much easier. While they are bobbing around in hot water finely chop a small onion and then cook slowly in a tablespoons of olive oil. Cook until soft, for about 5 minutes, and then add half a teaspoon of ginger, half a teaspoon of cinnamon and a pinch of saffron. Continue to cook the onion and spices for a few minutes longer.


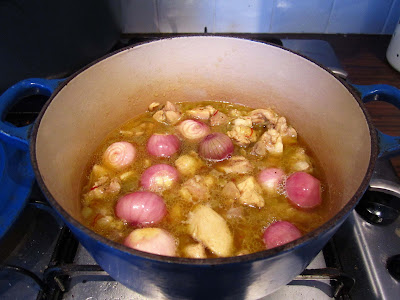
Chop about 300g of boned and skinned chicken thighs into bite size pieces, perhaps a bit more if you're really hungry. Add the chicken to the pan with the onions and spices, and when it is sealed all over add 150ml of water, the blanched onions with their skins removed and a pinch of salt and pepper. Leave the tagine to cook, on a medium heat, uncovered for about 20 minutes.


While the tagine is cooking you can prepare the couscous. It needs to be in a pan that can go in the oven. Use 100g per person, pour it into the pan and add the same amount of salted water to the couscous, cover and leave for 10 minutes. I used 200g of couscous to 200ml of boiling water with a teaspoon of salt in it. Fluff up the couscous after it has absorbed all of the water, it may have become quite a hard mass, but just break it apart with a fork until it is light and fluffy. Add a glug of olive oil and work it all through the couscous with your hands, getting lots of air into it as you do. Finally put the dish into a pre heated oven at 200°C for 15 minutes. Before serving stir a knob of butter through the piping hot couscous and fluff it up again. Claudia uses 20g of butter, but I think you can get away with a lot less, but just to your own tastes.

To finish the final stage of the tagine remove the chicken pieces from the sauce and set them aside, leave the onions in the pan to continue to soften. The sauce now needs to reduce and thicken up a bit. Add 2 tablespoons of honey and lots more black pepper, you need quite a lot to balance the sweetness of the honey. Just keep tasting it until it suits your taste. Turn the heat up a little and allow the sauce to bubble away and reduce by about half. Finally return the chicken to the pan to heat through for a few minutes.


Fill a bowl with a large scoop of buttery couscous and top with the chicken, sauce and onions. I sprinkled the top with some toasted sesame seeds, you could also use some toasted almonds roughly chopped. The gingery, cinnamon spice is lovely with sweet honey, spicy black pepper and soft onions. It is making me want to cook it again just writing this, I might have to wait until tomorrow...