Showing posts with label Pickling. Show all posts

Wednesday, 27 June 2018

A couple of Cherry Recipes

A huge thank you to everyone who joined in with our Kickstarter! We did it! We hit our target and raised all of the money, more infact! So I am very excited to get on with work at the new place and welcome you there as soon as we can! We have a planning application in and the builders will be starting soon, I will keep you up to date as it progresses.

Back to food! It's cherry season! I love cherries, being particularly partial to a black cherry ice-cream, or a maraschino cherry at the bottom of a strong cocktail in Nite Hawks, in a bakewell, or morello cherry jam on toast... There are big boxes of cherries for sale in the Grainger Market for £2 at the moment, it really would be rude not to... So I thought I'd share two simple recipes...

The cake is my take on a bakewell, all the flavours, but in a simple cake. The pickled cherries are a slight twist on a Diana Henry recipe, they go very well with a plate of cheese and are also good with things like chicken liver pate, terrines and cured meats. Enjoy cherry season while it lasts! 

cherry and almond cake, the grazer, cook house

Cherry and Almond Cake 

First a simple but delicious cake recipe! Heat the oven to 160˚C. Then melt 150g of butter in a pan, once melted set it aside to cool slightly. Combine 225g of self raising flour, 225g of caster sugar and a teaspoon of baking powder in a bowl. Then beat 2 eggs and 1/4 teaspoon of almond essence together in another small bowl.

Prepare the cherries, for this I used 2 handfuls cut in half and de-stoned. Line a regular cake tin with greaseproof paper, I cut mine into a circle and tuck it in rather than faffing on with different pieces, it also makes it easy to lift out at the end.

Finally combine the flour mix, butter and egg mix. Bring it together with a spatula, it is quite a thick batter like mix when it's done, mix it until it is smooth. Then add 3/4 of the mix to the cake tin and spread it out. You will think it seems like not very much but don't worry. Then lay the cherries over the mix in an even layer. Add the final 1/4 of the mix to the centre of the cake on top of the rhubarb. Quickly pop it in the oven and bake for 50 minutes. 

pickled cherries, cook house, the grazer

Pickled Cherries - For a 1 litre jar 

Leave the cherries stone in and stalk on, this avoids a lot of faffing about but also makes them easy to eat and pretty I think, you need about 500g. Then heat 350ml of white wine vinegar with 400g of caster sugar, 4 cloves, a cinnamon stick, a pinch of chilli flakes, 10 black peppercorns; stir so the sugar doesn't stick to the bottom. Bring to the boil and then add the cherries for 2 minutes.

Scoop them out into a 1 litre sterilised jar. Then continue to boil the liquid until it is a bit more syrupy, just for 5 minutes or so, then pour over the cherries. They should sit for a week or so before you eat them and will still be good after a year, getting more and more wrinkly and intense.

Monday, 9 April 2018

Pickled Rhubarb with Ginger, Orange & Clove

My god it's been a long winter, not that we are even out of it yet, but at least there are some signs. Today I felt the warm sun on me as I walked outside and I began to feel hopeful. Tomorrow it is forecast to rain all day, continuing for the rest of the week; but at least there are glimmers of hope...

We really felt this winter at Cook House. I lost track of how many times they tried to fix the roof, each time it seemed to have stopped leaking there would be another big freeze, a thaw, a shift, and subsequently a new leak. From November to February there was an issue almost every day and I shed some frustrated tears on occasion. Then the snow storms came, and there were no leaks as we were enveloped in a layer of snow and ice inside and out, totally frozen solid.

pickled rhubarb recipe

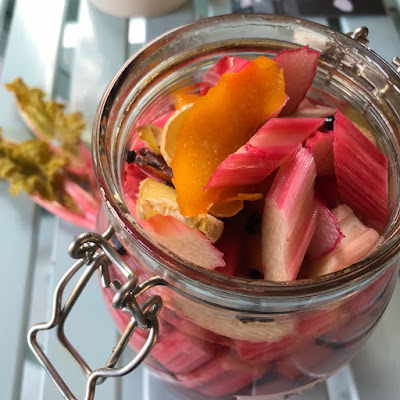
I can talk about it now that the other side is in sight, now that the daffodils are coming out and the sticks of rhubarb are beginning to appear at the allotment. People often ask me what to do with lots of rhubarb, it is a common allotment affliction, I only have a small plant and it produces more than enough for all my rhubarb requirements. Pickling is one of the answers I think; this pickle is really pretty damn good. It's lovely on it's own, great with cheese, rich liver pate or on top of a salad, and its super easy to make.

pickled rhubarb recipe the grazer

Fill a large, sterilised, 2 litre kilner jar with rhubarb cut down into 1- 2cm diagonal batons. I have seen recipes that ask you to put the rhubarb into the hot pickling liquid, but I find this generally makes it fall apart, so prefer to add the hot pickling liquid to it, as it softens, but keeps its shape.

pickled rhubarb recipe the grazer

For the pickling liquid combine 750ml water, 500ml white wine vinegar, 350g caster suger, 15g maldon sea salt and heat to dissolve everything. Then you can add your flavours, I used thick slices of fresh ginger, a few large peels of orange zest, a cinnamon stick, 2 cloves, a pinch of chilli flakes and a few black pepper corns. They all bring something to the party, heat and a kick from the ginger, warming chilli, fragrant orange... I don't usually love cloves, but here they really work and the musky flavour is mild but pleasant. Feel free to experiment with other flavours such as juniper, mace, cinnamon, coriander seed, fresh herbs...

Simmer the mix for 5 minutes to bring out all the flavours, then pour the hot liquid over the rhubarb and seal the jar, it will all bob up to the top to begin with and you may need to push it back down a few times over the course of first few days. It is delicious after a couple of days, really delicious after a couple of weeks and will keep well for months if you can manage not to eat it all...

pickled rhubarb recipe - the grazer

pickled rhubarb recipe - the grazer

Sunday, 11 June 2017

Elderflower Vinegar

Flavoured vinegars bring to mind a foodie gift that no one uses, in a pretty bottle from a posh deli. At least that was until I started experimenting with making shrubs; flavoured vinegars for drinks and cocktails, and suddenly I've become a bit more interested...


At Cook House at the moment we have vinegars infused with pineshoots, cherries, raspberry and black pepper, lovage and parsley, and most recently Eldeflower. I've got a long list of other things that I want to get on the go as they come in to season; full tomato stems on the vine, fennel, nasturtiums, gooseberries, rhubarb...

The Elderflowers are out everywhere at the moment, it seems to be a bumper year as I've spotted their big white blousey flowers waving at me everywhere I go. I have a good spot near Cook House that I pass when I walk down in the mornings so I filled a bag as soon as they appeared.

I've made batches and batches of Elderflower cordial in the past, but wanted to do something a bit more interesting with them this year, and something that I could add to the preserving shelves and use all year round. I'll have to think of something else to do with them too as there are just so many it seems rude not to.


I gave the flower heads a gentle shake to get rid of the tiny black bugs that love them so. Some of these will no doubt get in to the vinegar, but you can strain it through a cloth before you use it and it'll be fine. I went for the most straight forward approach for this vinegar, no heating or additional flavours. Simply fill a jar with flower heads and pour over good quality white wine vinegar. That's it. Give it a bit of a shake to get rid of any air pockets and then leave.

I've been giving it a bit of a swirl everyday and after a week the smell was delicious, really powerful Elderflower, stronger than the vinegar. Sometimes it can smell a bit sickly sweet for me so it works well in vinegar which balances it out. It is great in salad dressings, drinks or a spritz over BBQ'd meat or fish in place of lemon.


I have left the flowers in for two weeks so far and it is smelling and tasting very good. I strained some off to use in a cocktail at Cook House's Spring dinner evening last week (you can see photos here). We served 1 part gin, 2 parts lemon cordial, 1 part Elderflower vinegar and topped up with soda water. It was delicious! The cocktail aspect has definitely got me thinking about what to pop in the next jar of vinegar that might go well with a gin...


Tuesday, 10 February 2015

Fermentation fun...

I recently finished reading Cooked by Michael Pollen, ‘A Natural History of Transformation’ it took me forever, but reading time has been quite thin on the ground recently. I enjoyed it so much that I’m tempted to begin it again. I can’t quite remember what happened at the beginning; it contains so many interesting bits of information that I want to know better.

It tells the story of how cooking has shaped the evolution of man from the very beginning. Was it the discovery of cooking by our early ancestors, and not making tools, or language or meat eating that set us apart from apes and made us human? According to some of the hypothesis ‘cooked’ food altered the course of human evolution as it provided our forebears with an energy rich, easy to digest diet that allowed our brains to grow bigger and our guts to shrink. It seems that raw food takes much more time and energy to chew and digest, which is why primates similar to us have large, heavy digestive tracts and spend up to six hours a day chewing... Cooking allowed humans to devote their time, and metabolic resources to other purposes, like creating a culture.

Cooking also brought about occasion; of eating together at a certain time. Prior to this it was a hunter gathering affair, likely enjoyed alone as you searched for food. This new meal time occasion served to civilise us.

The chapter that was most fascinating to me was the one about fermentation, and its benefits. Before tins, fridges or freezers, fermentation was the main way that people preserved food. With the earliest methods being pits dug into the ground, lined with leaves and filled with vegetables, meat, fish, etc. The earth kept the temperature low and contributed microbes; lactofermentation would begin within days and eventually produce enough lactic acid to preserve the food for months, sometimes years.

Lactic acid ferments that you would know today include sauerkraut, olives, pickled vegetables, kimchi, live yoghurt, cheeses and sourdough bread. Fermenting food not only extends their shelf life; it can also create entirely new nutrients and intensify flavours

The theory goes that our diet has changed so much that we are missing out on these live bacteria and nutrients that historically kept us healthy, under a regime of ‘good sanitation’ they are now washed off, boiled out of, or removed entirely from our food. Nine out of ten of the cells in our bodies are not human but microbial; and they need living food. Your gut needs these cells to stay healthy, they can be credited for all kinds of things from better digestion, reducing inflammation and therefore depression, boosting your immune system and preventing cancers of the digestive tract.

Historically your milk wasn’t pasteurised, neither was your cheese, your beer and wine were home brewed and contained live wild yeasts, you pickled, preserved and fermented food, all filling your immune system with lovely healthy live bacteria, keeping you fit and strong. It just seems to make a lot of sense to me; I might become a live food bore!

On my fermentation ‘to do’ list I have homemade yoghurt and saukraut to try, but I started with Middle Eastern Fermented Turnip and Beetroot, and a Lacto Fermented Butternut Squash. I realise these don’t sound the most glamorous of recipes, but they are delicious; with potted meats, cured meats, pates, diced into salads or as a crunchy snack.


Middle Eastern Turnip and Beetroot

In a pan, heat about 250ml of water, then add 70g salt and bay leaf, stirring until the salt is dissolved. Remove from heat and let it cool to room temperature. Then once cool, add 250ml of white wine vinegar and 500ml more water.

Cut 1kg of turnip and a small beetroot into batons, about the size of skinny fries. Put the turnips, beets, and 3 cloves of sliced garlic into a large, clean jar, then pour the salted brine over them in the jar, including the bay leaf. Cover and let sit at room temperature, in a relatively cool place, for one week. They are then ready to serve.

They keep for several weeks, turning a lovely bright pink colour with a good crunch. Serve them with cold meats, cheese, pates and terrines or chopped into salads.


Lacto fermented Butternut Squash

Peel the raw butternut squash. You need about 700g to fill a large mason jar. Leave a small section of squash unpeeled so that you can include it at the top of your ferment. Make a brine by dissolving 1 tablespoon of salt into 500ml of room temperature water.

Cut the peeled squash into batons. Place the peeled and chopped squash into a large jar. Add the unpeeled pieces of squash to the top and pour brine over the whole thing.

After five days of fermentation, your squash will be ready. Keep in the fridge.

Wednesday, 3 December 2014

How to make Salt Beef

I was down in London earlier in the year, eating, which is usually what happens on a jaunt to London. I write up a strategic plan of how to eat in as many places as physically possible before the train home departs, at least three places per day, sometime more... I find inspiration, fullness to the extreme and a very empty purse ensues...

But earlier in the year for some reason we found ourselves hungry, on Brick Lane, mid afternoon, I’m not quite sure how the hunger had managed to make an appearance but... there before us was the famous brick lane bagel shop, so we queued and ordered salt beef bagels, and my god they were good... a different ball game, what even are those things in the shops they call bagels, the salt beef, the bagel, so good...


I returned home and started planning a salt beef bagel supperclub, it happened earlier in the year at The Cumberland Arms... and went down a treat, there was even beer matching, we called it 'Some like it Hops'... If you have never made your own bagels and like baking you must try it, it’s hugely satisfying and just a whole different species from a shop bought one, fresh, bouncy, a chewy delicious crust and soft inside, so good, I blogged about them earlier in the year here...

But now to the salt beef; I’ve been making my own since then, honing the recipe as I’ve experimented, I think I’ve got it down to a tee now, at least how I like it anyway. I began with a Tim Hayward recipe from the Guardian, a step by step photo thing which made it look easy, and to be honest, it is, it just takes a while... In simple terms you make a brine, brine some brisket for a while, then simmer it with stock vegetables and you have your salt beef, all ready to fall apart into your homemade bagel...


I favour a stronger brine, saltier in short, I think the meat ends up tastier, so I now use a St John recipe for a good strong brine. These amounts make 4 litres of brine, which is enough to brine up to 5kgs of brisket, just make less if you have a smaller piece. You can use this brine for loads of other recipes too, pork belly, ox tongue, other brisket recipes... In a large pan combine 400g caster sugar, 600g sea salt, 12 juniper berries, 12 cloves, 12 black peppercorns, 3 bay leaves and 4 litres of water. I also add 30g of Prague Powder #1 which contains saltpetre, a curing agent, which encourages the meat to turn that lovely pink colour and cure evenly. Bring everything to the boil to dissolve the salt and sugar then leave to cool to room temperature.


Then you can add your brisket. I add 5kg of brisket to this brine, in a big Tupperware bucket that I keep at the bottom of the fridge. I cut it into 4 or 5 pieces, not tied up, just loose, then weight it down with a few plates to keep the meat fully submerged. I have left it to brine for anything from 5 days to 15 days, a week is ideal. Turn the meat around every couple of days, so it cures evenly. If you are only doing a small quantity you can put it in a freezer bag and fill that with the brine and just turn it over each day.


When you are ready to cook the beef remove it from the brine, add it to a large pan with a whole onion cut in half, a carrot cut in half, 2 bay leaves, some parsley, a stick of celery, some peppercorns, a few juniper berries and lots of cold water so it is fully covered. Bring it to the boil and then let it simmer for 4 hours, a very gentle simmer, the water just wants to be moving a tiny bit, so you are cooking it very gently. After 4 hours the meat will fall apart into lovely pink shreds. You can serve it hot with horseradish cream and potatoes, or pull it apart and put it in a bagel with lots of Sweet Cucumber Pickle and English mustard. It’s a delight, sorry I haven’t told you about it sooner...


Sunday, 12 October 2014

Hawthorn Berry Chutney

I'm full of cold today, I've just taken a 'night-time' cold and flu tablet, I don't need much encouragement to sleep at the best of time, so I'm fully expecting to be comatose within about 20 minutes, I'll type fast... So autumn brings colds and flu, but also the best of the seasonal food in my view...


In my kitchen at the moment I have a mix of amazing looking squashes, bags of hawthorn berries, pickles in jars of all shades and colours dotted around, it really feels like a bounty compared to any other time of year. It is a pleasure having the time at Cook House to pickle, pot and preserve as the autumn sun streams in the windows. The nooks and crannies of the Ouseburn are also filled with blackberries, rosehips and elderberries, massive spiders and thorns, but I have still managed to fill up punnets with various hedgerow bounties... add to that the start of the shooting season and I couldn’t be happier to be back in the throes of autumnal dining... 


I'm pretty pleased with this chutney, I have always imagined hawthorn to be poisonous, but it turns out you can eat all of it, leaves, blossom and berries... The trees in the Lake District last weekend were heavy with hawthorn berries, I filled a bag full. The little hawthorn berries are plentiful at this time of year and they make a delicious chutney, good with cold meats, game and cheese, a tasty sweet-spicy sauce... 


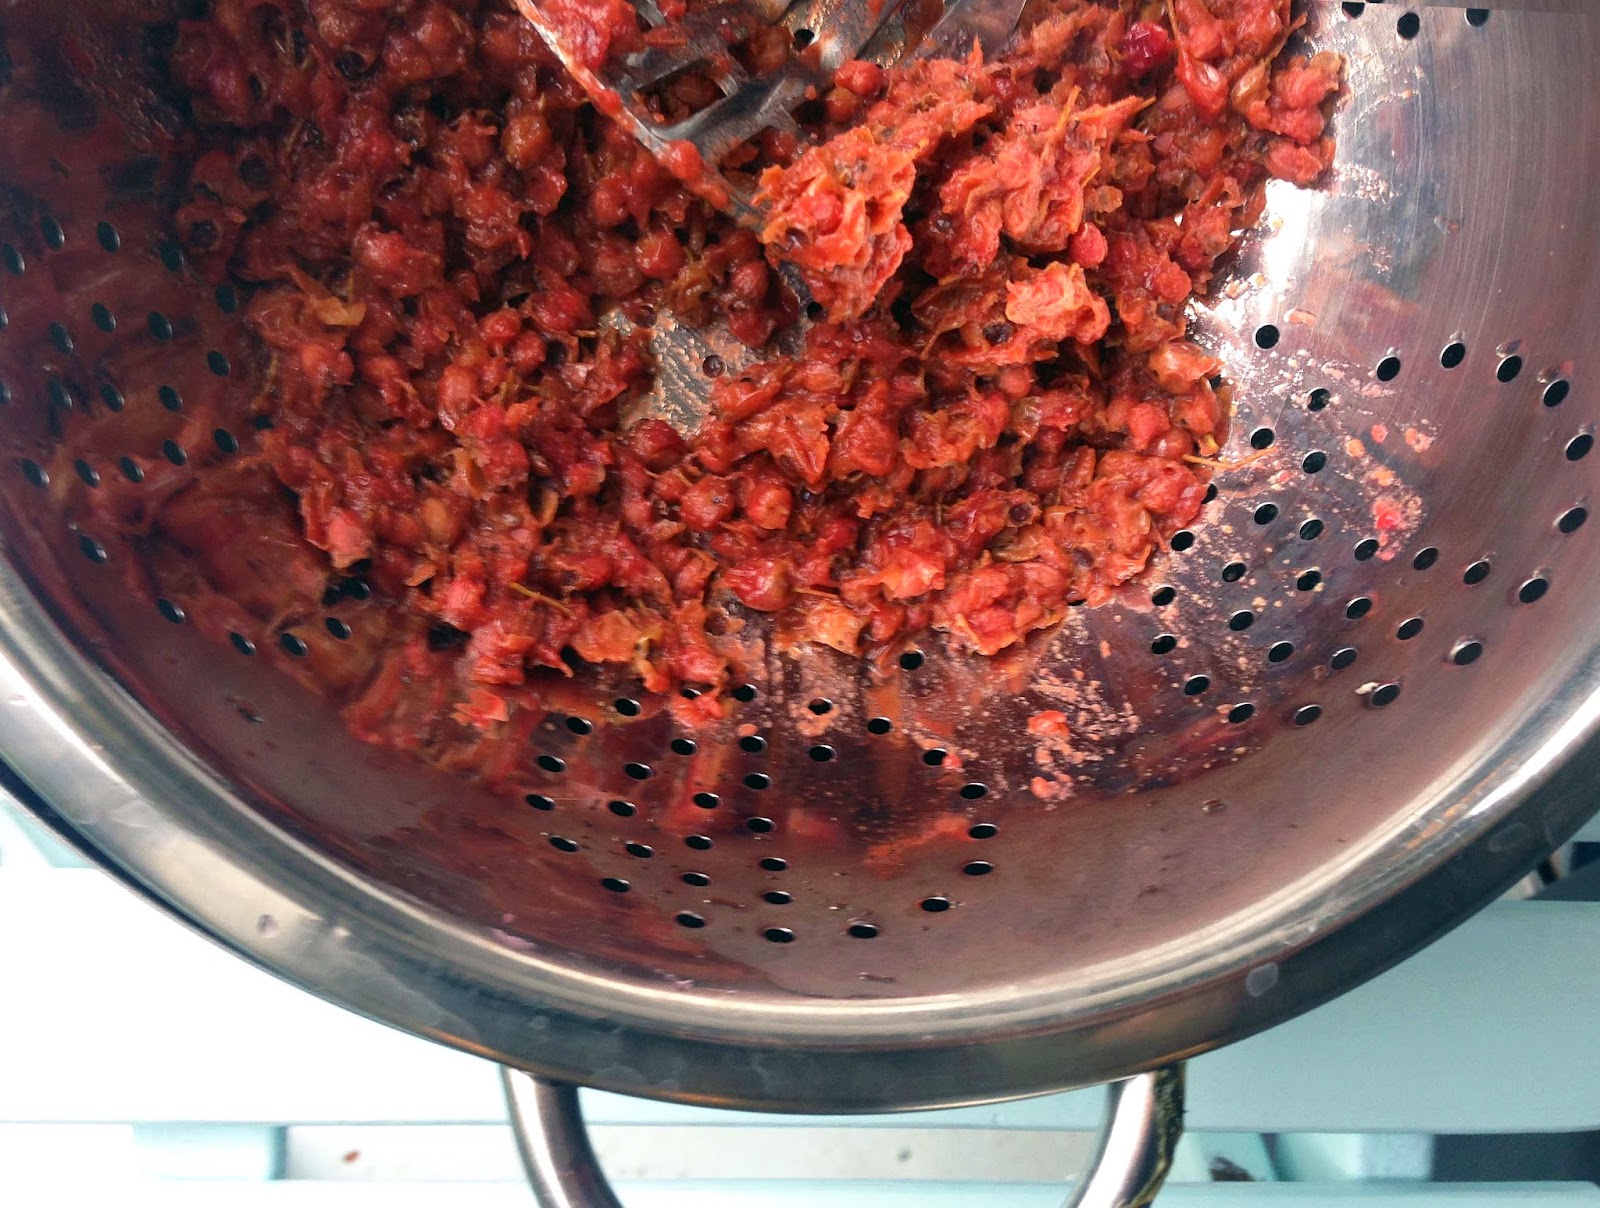
Snip the berries from their stalks, about 1kg of them, wash them then simmer in 500ml of cider vinegar and a teaspoon of salt. Simmer for an hour then press through a sieve into a clean saucepan, keeping the syrup you extract. Add to it, 125g of raisins and 300g of brown sugar, 1 teaspoon of ground ginger, 1 teaspoon of ground nutmeg, ¼ teaspoon of ground cloves, ¼ teaspoon of ground allspice and a grind of black pepper. Then simmer uncovered for 15 minutes until quite thick and pour into clean jars and seal. It is delicious with a slice of game terrine, rich spicy and quite different from any chutney I've ever had...


Monday, 25 November 2013

Spiced Apple Chutney

I think perhaps I forgot I had a blog, or at least I haven’t really had time to have one recently. I've been cooking easy 'go to' recipes like kedgeree or meatballs or things on toast, that I have told you about before. New things I have cooked have either been bad; apple, pancetta and sage risotto, don't go there... Or delicious, but I didn’t take any photos; celeriac and truffle dauphinoise and braised venison in red wine with orange and juniper, my god that was good. I also suffer at this time of year with the dark evenings; I just have a little automatic camera which has seen me very well for the past few years taking some beautiful pictures, but at this time of year in the low light everything just looks blurred and orange. I might just take the plunge and get the fancy pants camera I've had book marked for the past 6 months, or perhaps I should buy some Christmas presents...


I always make some Christmas presents, a few years ago I went to extreme lengths with potted duck, white chocolate and cranberry biscuits, chocolate truffles, chutneys, pickled grapes, florentines, the whole lot... I think a few jars of chutney and some chocolates might be my limit this Christmas, it's been a busy year! This Spiced Apple Chutney, which I have made a few times before, is perfect if you're thinking of making foodie presents for Christmas this year this is a winner. I've made it before in little jars with tiny parcel tags and it went down pretty well I think. Delicious with cheese, or lush Christmas ham with that sugary mustard crust, in sandwiches, with cold meats or potted game, any excuse really...


This isn't a recipe that has to be followed exactly to the letter, how sweet it is will depend on your apples, some recipes add cinnamon or nutmeg too, paprika, allspice or malt vinegar, you can play around with it, the following recipe is what I've settled on as one of my favourites...


Peel and dice 900g of cooking apples, I've used a mix of cooking and eating before too. Then combine 550g of caster sugar, 200g of brown sugar and 900ml of cider vinegar. Heat the mixture through to dissolve the sugar and add a tablespoon of ground ginger, 2 tablespoons of mustard seeds, a large pinch of salt followed by two large diced onions, 2 cloves of garlic crushed and chopped and 250g of raisins. Finally add all of the diced apples and stir it well. Then simmer for about an hour, it is difficult to say exactly as it depends on the amount of water in your apples. I have cooked it for 45 minutes before, and also 2 hours... You want it to turn quite dark and to begin to take on the consistency of warm thick jam. Then pot into warm sterile jars.


Finally leave it to sit, for it to do its stuff. Be patient, I'd say 3 weeks minimum, in a cool dark place, some people say 6 weeks. I've never managed to wait that long but it's perfect timing for Christmas presents... It is my favourite chutney I think, sweet, thick tangy and spiced, SO good with some ham, bread and butter or a piece of cheese. I was so disappointed when my last batch ran out, I'm hoping the next one will be just as good!! It keeps for ages, recipes say to eat chutneys within a month, but generally they last a lot longer, if you can manage to not eat them for some odd reason...


Wednesday, 13 March 2013

Some thoughts on Pickling...

I've been experimenting with preserving food for a while now, salting, curing and pickling. I've found that when preserving your own food pickling is a good place to start, it's relatively easy, quick and cheap. I've dabbled with curing and salting, salami and fish, and have future plans for brasola and bacon.

Pickling embraces each of the seasons, but also defys them as it allows you to eat things all year long. Fresh sharp zingy young vegetables remain so delicious pickled and there is a pickle to suit nearly every meal, whether meat, fish or cheese... Fridges were a luxury as little ago as the 1950's so things had to be stored for future use in increasingly inventive ways. The necessity to preserve and not waste is one we could learn some lessons from these days, with statistics suggesting recently that up to 30% of food finds it's way to our bins rather than our tables.


Pickled fish, herring or cured gravadlax, dill pickles, sweet cucumber pickles... Pickling and preserving are both very prevalent in Scandinavian dining. Something that is very on trend at the minute. A combination of the influence of furniture giant Ikea, the crime fiction of Henning Mankell and successful TV shows such as The Killing and Borgen have raised the profile of Scandinavian culture in the past few years. Winter fashion has gone a bit Scandi recently with fur-lined boots, and cable knit, Nordic patterned jumpers, while in the culinary world with Noma in Copenhagen being acclaimed the World's Best Restaurant in 2012 their style of cooking is influencing chefs worldwide.


'Secrets of Scandinavian Cooking…Scandilicious' by Signe Johansen is current on my reading list. Signe grew up in Norway and now runs a blog about cooking, baking and living with Scandinavian flair. She also runs the 'EatScandi' Brunch & Supper Club. I'm looking to improve my SmörgÃ¥sbords and I think she may have some tips...

Over Christmas Ocado launched its first Scandinavian Christmas Shop as "Scandinavian food has seen a massive rise in popularity across the UK this year and we like to be ahead of the trends." Top sellers were Nyakers pepparkakor – traditional Swedish ginger biscuits and the traditional Scandinavian favourite, pickled herring. It isn't that difficult to make it yourself if you're feeling adventurous... I imagine Sarah Lund sits eating pickled herring whilst wearing chunky knitware all the time, well, when not running into dark basements in pursuit of armed killers...


So I thought I would share my two favourite pickles, one easy, one a bit more complicated, Sweet Cucumber Pickle, a delicious sharp sweet crunchy pickle and Pickled Rollmop Herring, soft spiced pickled fish that is fresh and delicious. Click on each link for the full recipe.

I've also been experimenting with pickled grapes to go with cheese, pickled apples, and am keen to try some pickled garlic and lemons soon.

Wednesday, 5 September 2012

Rollmop Herring

Herring have a long historical connection with the North East of England. Originally the small scale exploitation of an abundant local resource, fishing grew to become a thriving industry all down the east coast during the last century, with whole families in the coastal community relying on Herring for their livelihood. Too much of a good thing eventually saw the fish run out and the industry decline but these versatile, if unfashionable, fish are still caught in the North Sea today.

The herring are in season over the summer in the North East and cost next to nothing. These little fellas were 50p each from the Grainger Market. I bought them to go into Mr. Smokerson, home smoked herring sounded delicious, even though the guys at Craster are pretty good at it I fancied a go. That was until I found out it took 5 days... And even by my standards taking 5 days off work to sit and smoke some fish seemed a bit excessive.


The herring season begins in June in Scotland and works its way down the North East coast over the summer months towards Lowestoft, coming to an end in November. Amble, Cullercoats and North Shields were our main local fishing harbours for herring back in the day. Amble harbour was built in 1830 and was famous for its fishing cobels, which were out in force to catch the 'silver darlings' as the herring became known.

My great grandfather used to have two cobels in Amble harbour; they were beautiful boats, each being built specifically for its user. Boats fished with seven or eight lines, about 200 metres long, with 500 to 1,000 hooks on each, baited with mussels. Baiting the lines was a very timely task usually left to the women, old men and children at home; with children often being absent from school during the herring season. A harbour in Lowestoft once recorded a catch of 60 million herring in one day, so you can see why they were an important visitor...


The rollmop, essentially a pickled herring, has been a staple in Northern Europe since Medieval times, probably being more popular in the Baltic areas of Northern Europe than over here. I have always enjoyed them so decided to give them a go. I went with a Hugh Fearnley-Whittingstall recipe for my first attempt, a cider vinegar and orange pickle. The flavour is really deep and rich compared to other roll mop I have had, spiced and orangey, but fresh and sharp with sweet soft fish.

To start you need to take the fillets off each of the fish as carefully as you can, I'm not the neatest at this yet but am getting better... Then remove any bones left in the fillets, running your fingers along them to feel where they are and pulling them out with some little pliers or tweezers. Dry each of the fillets with kitchen roll and then place them into a plastic Tupperware type container. Dissolve 60g of salt into 500ml of cold water and pour this brine over the herring fillets, then leave for 2 to 3 hours.


To make the pickling mixture add 500ml of cider vinegar, 250ml of cider, 12 allspice berries, 12 black peppercorns, 6 bay leaves, 1 tablespoon of brown sugar, 1 teaspoon of mustard seeds, the zest of an orange peeled in wide strips and a thinly sliced small onion. I also added a pinch of general pickling spices. Bring this all to the boil and simmer for a few minutes, then leave to cool.


When the fillets are ready to come out of the brine dry them carefully with kitchen roll. You will need a large kilner jar or something similar that seals tightly. Roll up each of the fillets, skin side out, from tail to head; and pack them into your container tightly so they stay rolled. Then pour over the pickling marinade, make sure you have orange and spices in the jar with the fish and liquid, then seal the jar. Store them in the fridge for at least 3 days before eating, they will keep for about a month, and are best between 5 and 10 days. The longer you leave them the softer the fish becomes and the more pickled they will taste.


Pickled fish doesn’t immediately set everyone's taste buds tingling, but these are really fresh and delicious, sharp vinegar with rich orange and spices and the fish tastes fresh, soft and delicious. Hugh recommends serving with some brown bread and sour cream; they have been a treat to have in the fridge over the past few weeks. I will definitely be making more, trying different pickling combinations as I go. I have come across recipes using mace, white wine vinegar, dill, cloves, fennel... I had best get back to the Grainger Market before the season ends...


Sunday, 22 January 2012

Bread and Butter Pickle

I am warm... The heating is fixed, the boiler works, Ted saved the day... It means that I can think about foods for reasons other than the amount of heat they give out. Like this little pickle... I made a few jars of it for Christmas hampers, and now that Christmas is all but a distant memory I am still thoroughly enjoying it. It is based on a Bread and Butter Pickle that Rick Stein sells in his Cornish empire, I was given a jar as a present a few years ago and loved it. I haven’t found an exact recipe so this is a combination of a few that I may continue to tweak further, but is still pretty damn tasty...

The name is confusing, it doesn’t have any bread or butter in it... I've struggled to find an explanation, well at least a consistent one. It does define it from a sweet pickle or a dill pickle, and is often served with hamburgers in America, but I don’t know why exactly it is called bread and butter. I find it delicious with cold or smoked fish, salmon, cooked ham and even with cheese and biscuits.


As a process it is much easier to make than many other pickles, just heating the vinegar sugar and spices and adding the cucumber. That's it really... So in a large bowl thinly slice 1 large cucumber, 1 large onion and 1 green pepper. If you like a crunchy pickle go a little thicker, but I like the way all the ingredients mingle when really thinly sliced. Add 30g salt to the sliced vegetables and mix it well so the salt is evenly distributed. Cover the whole lot with a layer of ice cubes and leave to stand at room temperature for 2 hours.


In a large pan mix 100g caster sugar, 120ml cider vinegar, ¼ of a teaspoon of ground turmeric, 1 tablespoon of mustard seeds, 1 tablespoon of coriander seeds and ¼ of a teaspoon of celery seed. Bring it to the boil and then add the cucumber mix. Drain off any melted ice water but the salt should stay so don’t rinse anything... Then bring it all to the boil again, remove from the heat immediately it starts to boil and then leave to cool. Store the pickle in sterilised jars and keep them in the fridge once opened, it is ready to eat after about 24 hours.


It is a tangy spiced pickle but also quite sweet, not in the same way as a sweet apple pickle, perhaps a bit more sweet and sour at the same time. It is delicious in a sandwich, it goes perfectly with pastrami and salad on thick brown buttered bread... Have it with cured meats, charcuterie or smoked salmon or with some hard cheese and oaty biscuits...